Homemade hot air pencil

I've been lucky enough to own two hot air stations. An Edsyn Atmoscope which I loved to use but had some limitations on larger parts and a Aoyue hot air station which is more flexible, but not the build quality of the Edsyn.
However, because I like to tinker I've also tried a few home-grown solutions. Most of these center on an aquarium pump for air and steel wool for a heat exchanger. I haven't had good luck with these -- maybe because I don't have the right components or maybe because I'm "spoiled" with real tools.
The truth is, the best "cheap" results I've had have been with an $20 embossing gun I got on sale for $10 at Hobby Lobby. If you are handy enough with metal working to get it to accept they cheap Aoyue tips, I think it would be good enough for just about everything and they are cheap enough to replace if you burn one up.
Here's a homebrew station that looks promising though. It uses part of an old hair dryer and a soda bottle for the air source. I haven't tried it, but surely it would produce more air flow than what I've done in the past.
Another idea is to hack up a "heat gun".
Here's at least one (plenty of other homebrew SMD irons on the same site).
Labels: electronics, smd
Submit to:
 Del.icio.us |
 Digg |
 Slashdot |
 Diigo
Diigo
Working with Surface Mount CPUs
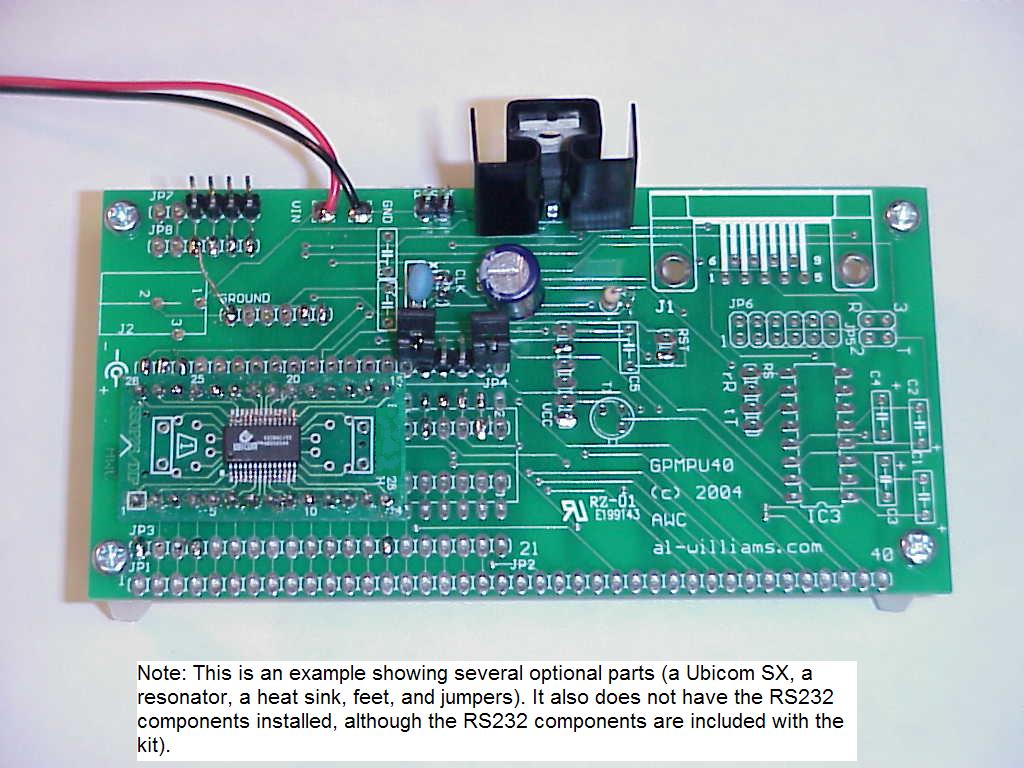
Over at
AWC you can find a neat board called a GPMPU40 that allows you to work with just about any DIP CPU ranging from tiny 8 pin CPUs to big 40 pin CPUs (yes, I know the title is about working with surface mount -- I'm getting there).
The board has two patterns of holes -- one for .3 inch chips and one for .6 inch chips. In addition there is a place for a regulated power supply, a ceramic resonator or crystal, a reset circuit and switch (active or passive reset), and the ubiquitous RS232 port with a MAX232. There's also a 40 pin header that brings each pin out to the board edge for interconnect. If you install an upside down header there, you can plug the whole board into a solderless breadboard.
Each section of the board has holes so you connect the sections as you see fit. So if your processor has power on pin 1 and ground on pins 8, 9, and 22, that's how you wire it up. If you put headers everywhere, you can use
jumpers to make the connections quickly and non-permanently. If you aren't using a 40 pin chip, you can use the leftover space for a EEPROM or a serial A/D or any other small support chip you might need.
I've used these boards to wire up just about every Microchip PIC you can imagine, 8051 chips from Maxim and Dallas, Zilog Z8s, Ubicom/Scenix/Parallax SX chips, Basic Stamps, Motorola chips, Atmel ATMega chips -- and many more. But lately, more of the interesting CPUs are in surface mount packaging.
The picture above shows the board which is now available with a 28 pin SSOP footprint (the processor is a 50MIPs Ubicom SX). You still have enough room for an 8 pin DIP underneath, although in the picture I used the extra space for jumpers to select an internal clock (the blue resonator) or an external one from an SX-Key (connected to the 4 pins in the top left corner). I didn't install the RS232 components, although they are part of the kit.
If you are wanting to work with surface mount, this is a good way to dip your toe in the water. Even with a regular soldering iron you shouldn't have any trouble with a 28 pin SSOP. You just need a fine tip (I like to use a screwdriver tip on its side) and fine solder or blob solder all along the edge and wick up the excess (use plenty of liquid flux like that from a flux pen). If you use the blob method, you can use an embarrassingly large iron and thick solder!
Of course, there are other ways to solder surface mount. Hot air and paste is good for doing lots of parts at once -- especially ceramic capacitors where sudden heating might crack the component. But for 28 IC pins, I'd just stick with a good old fashioned contact iron and fine solder. If you want to practice get an old board (like a PC network card) that you don't care about anymore. You want a good source of heat like a pencil torch or an embossing gun (get these at a hobby store like Hobby Lobby for less than $20). Heat up the area around a chip until the solder starts to melt and then with tweezers just lift the chip. This is a throwaway, so you don't really care if you damage the chip or not (although with practice you can use either of these tools to do this reliably). Now with a regular iron, flux, and either a wick or a "solder sucker" clean up the pads and IC pins. Now practice putting the chip back where it went. Kind of like being in the Army and digging a hole and then filling it back in! But practice makes perfect.
So don't be afraid of surface mount. You can find the board at the bottom of
this page (which mostly talks about the DIP version).
Labels: electronics, microcontroller, smd
Submit to:
 Del.icio.us |
 Digg |
 Slashdot |
 Diigo
Diigo
SMDs with the New Iron
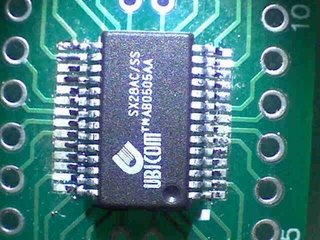
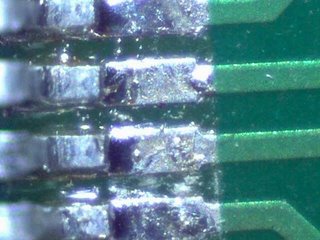
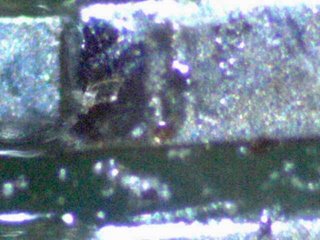
Still working on the best techniques with the new solder paste, so this needs a little work. But not bad. Oh, the pictures (at 10x, 60x, and 200x) were taken with a
QX-5 USB microscope. Not essential for SMD work, but nice to have.
Labels: electronics, smd
Submit to:
 Del.icio.us |
 Digg |
 Slashdot |
 Diigo
Diigo
Hot Air Soldering
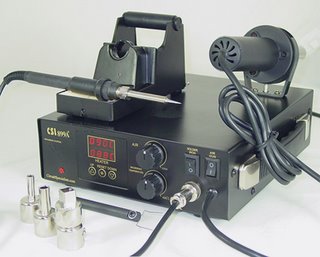
Through a long boring story, I wound up without my excellent Edsyn 1036 hot air soldering station. If you haven't used a hot air station to solder surface mount, you don't know what you are missing. Sure, you can use a lot of hand techniques to do surface mount. However, removing SMD is trivially easy with hot air. Also, some delicate components like ceramic capacitors don't like to be suddenly heated up, so hot air is best for those too. Of course, to use hot air, you need paste, and that's a pain because it is hard to buy in small lots and it usually needs refrigeration.
The Edsyn iron I used to have was very well built -- it ought to be; new they cost about $800. I had bought my refurbished, and the vendor did not have any more to sell. The only complaint I ever had about the Edsyn is that it doesn't have the wide variety of tips you can get for some of the other stations (like a Hakko, for example). Well, the air pump's a little noisy too (a diaphragm pump), but that's not a serious problem.
After a little consideration I picked up the station shown from CSI for about $130. I'll have more to say about it later, but here's the quick points.
1) It works fine. The quality doesn't match the Edsyn, but neither does the price tag. The switches are positioned funny and the manual talks about screwing down the soldering iron holder but there is no actual way to do that! A few well-placed magnets took care of that problem, by the way.
2) Reasonably quiet turbine motor. They say these are better for BGA work which I haven't done anyway.
3) The handpiece is a little large, but it takes Hakko tips which means you can get lots of tips for them Ayoue and/or CSI sells compatible tips for lots less than Hakko too (about $8/each). If you buy one, get a smaller tip then the ones that come with it for times when you want very fine control.
4) The digital temperature is only for the hot air. One display is the set point and the other is the actual temperature. There is no temperature readout for the standard iron even though it is temperature controlled through the bottom knob.
But overall it works fine. I'll post more about my SMD experiences soon. The handpiece, by the way, is available by itself for well under $100. You don't need the bulky station.
See the handpiece here
.
Of course, if you are on a real budget, try
this embossing tool
. You can find these on sale sometimes for way under $20 and even at full price, its around $20 or $25. The only problem is the nozzle is just a little too fat, so it takes some practice. Also, you can't adjust the air flow. But with some practice, you can solder and desolder pretty well with this cheap gun. The plastic nozzle guard comes off with a set screw and reveals a metal nozzle with some flutes in it. It won't quite fit a Hakko nozzle, but I think you could probably work something out with an intermediate metal tube and a hose clamp. You can always shield nearby PCB areas with foil. And if you are just stripping boards, the large nozzle is a plus anyway.
Labels: electronics, smd
Submit to:
 Del.icio.us |
 Digg |
 Slashdot |
 Diigo
Diigo
Surface Mount
I've used a lot of methods to work with surface mount components. I've carefully soldered and I've used the "slop and wick" method to mount tiny ICs to PCBs. I also invested in a hot air station (more on that one day) and I've seen people use toaster ovens for reflow.
Here's a new method I ran across on the Web today:
http://www.reconnsworld.com/griddle_reflow.html shows using an electric gridle and easy to find paste to do surface mount. Interesting!
Labels: electronics, smd
Submit to:
 Del.icio.us |
 Digg |
 Slashdot |
 Diigo
Diigo
 I've been lucky enough to own two hot air stations. An Edsyn Atmoscope which I loved to use but had some limitations on larger parts and a Aoyue hot air station which is more flexible, but not the build quality of the Edsyn.
 Del.icio.us |
 Digg |
Slashdot |
 Diigo
Diigo


 RSS Feed